Table of Contents
● Custom Business Copilot AI Chatbot;
● Available 24/7 to Enhance Support Experience;
● Personalized Training with Customized Knowledge;
● Instant Answers to Your Enterprise-specific Questions;
● No Coding Required to Support Multiple Languages.
Learn MoreStart for FreeHow to Set up Member Permission for Chatbots?
Table of Contents[ShowHide]
Setting up member permissions on ChatInsight.AI allows you to control the level of access and functionality that each member has within the platform. Here's a step-by-step guide on how to set up member permissions on ChatInsight.AI.
1Set up Member Permission on Member
- Step 1Edit Member Permission
- Navigate to the ChatInsight.AI dashboard and click the "Member" button. Select the member and edit.
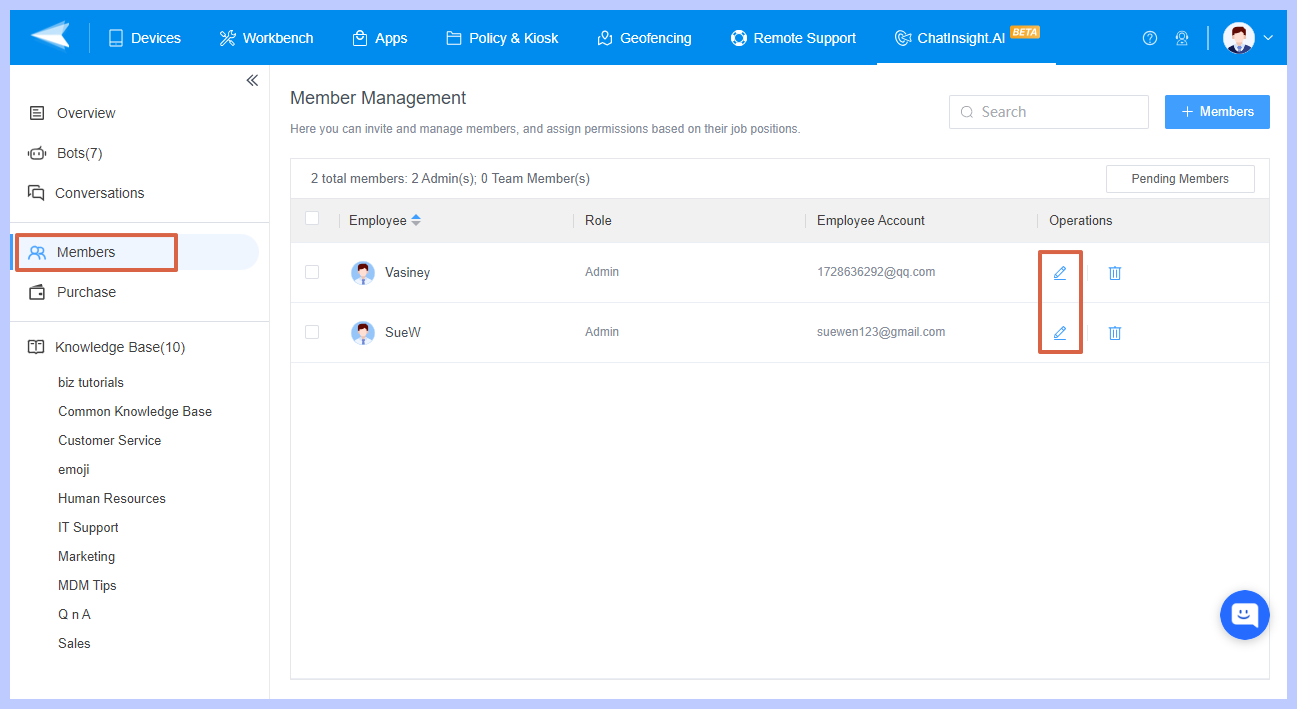

- Step 2Edit Member Roles
- You will see a list of existing roles including options like "Admin" and "Team Member". Choose the role that you want to modify. Once you have selected a role, click on "OK" to save.
- Note : Admins can manage all bots and knowledge base categories, and invite and manage team members. Team members can only manage designated bots and knowledge base categories.


2Set up Member Permission on Bots
- Step 1Open Bots Dashboard
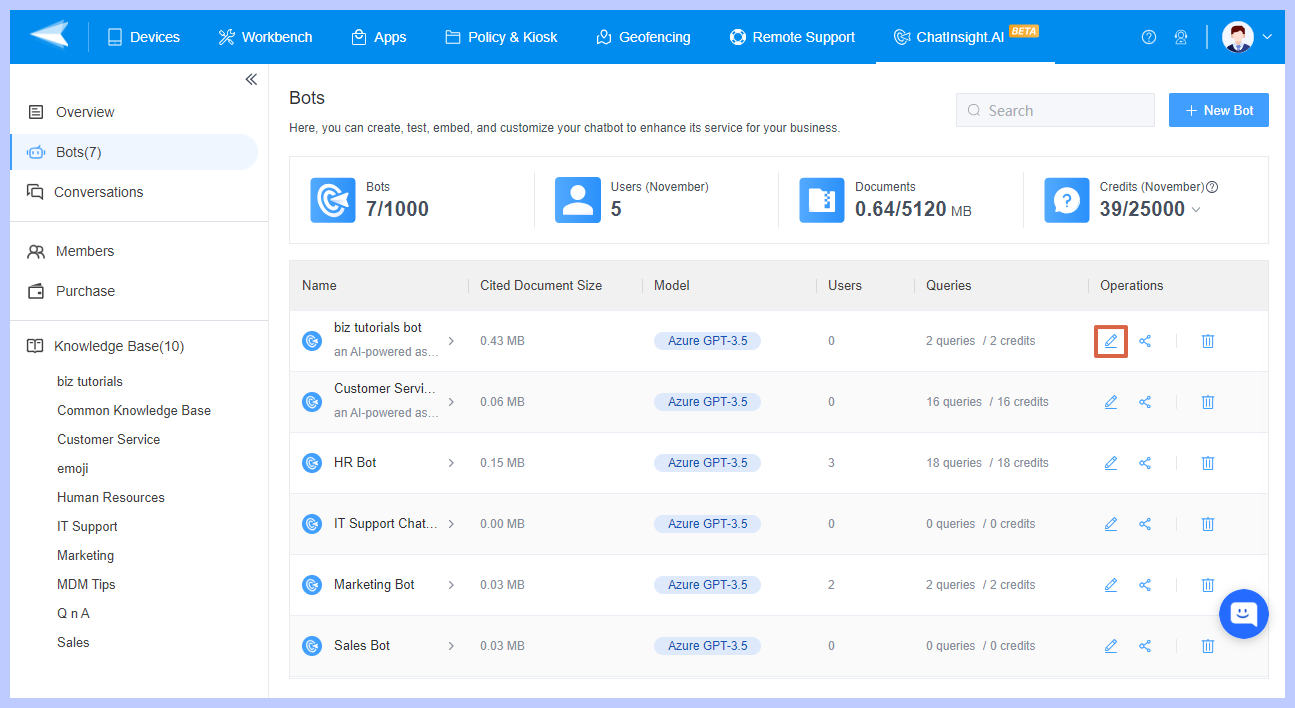
- Enter the "Bot" option. Choose the bot and click on "Edit" icon to proceed.

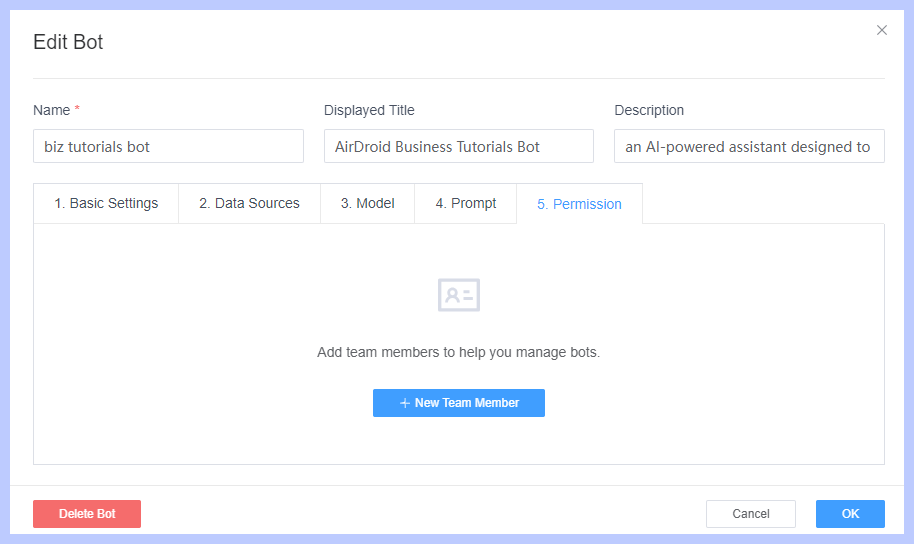
- Step 2Edit Bots Permission
- Now select the "Permission" option, then click on "+ New Team Member" and locate the member you want to assign the role.

- You can set different permissions for the member.
- ● Manager Mode: Manage members and edit/delete bots.
- ● Editor Mode: view or edit bots.
- ● Viewer Mode: view bots only.
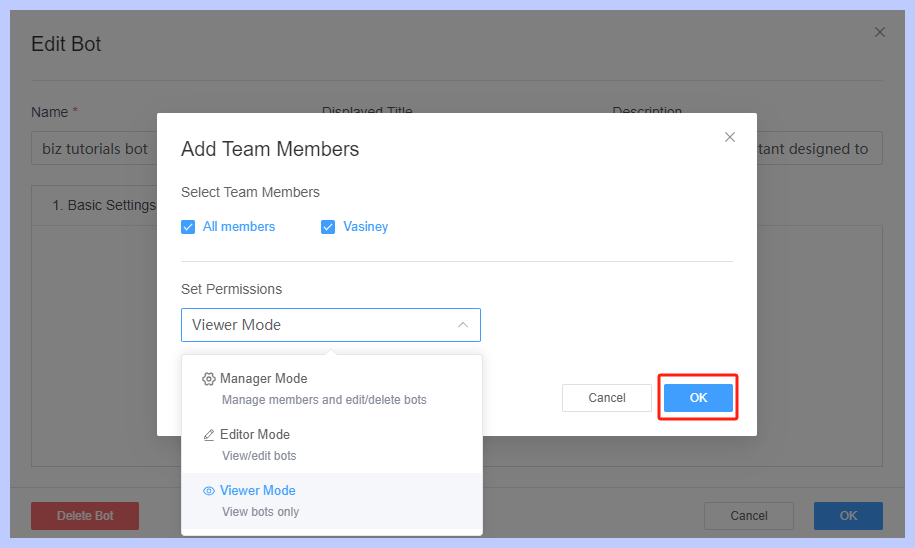

- Once you have selected a role, click on "OK" to save.
3Set up Member Permission on the Knowledge Base
- Step 1Open Knowledge Base
- Look for the "Knowledge Base" and click on edit to proceed.
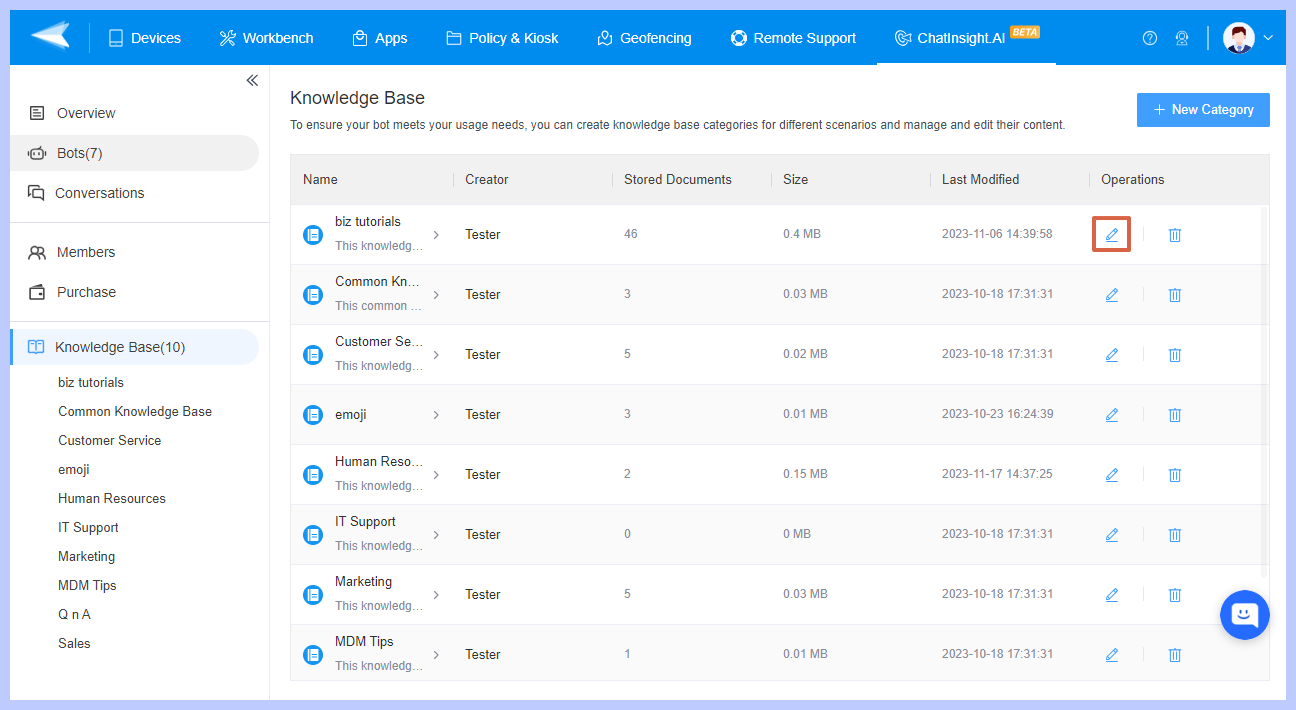

- Step 2Edit Knowledge Base
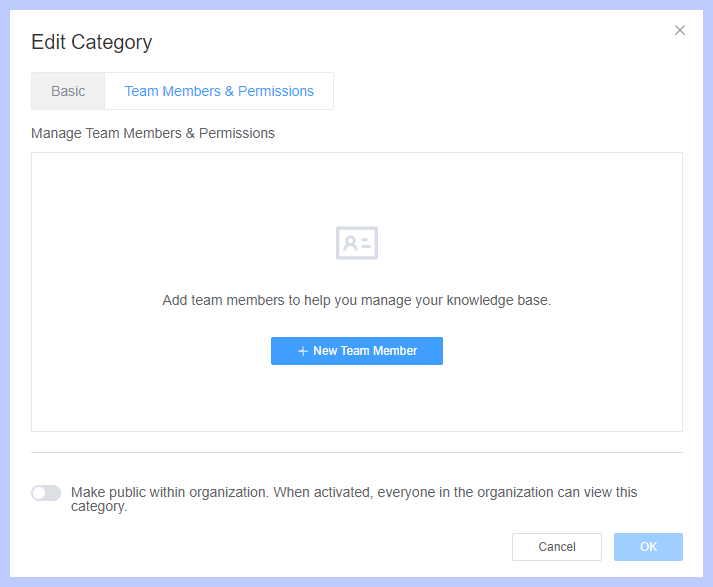
- Within the Knowledge Base settings, you should find an option button "Team Members & Permissions", click on it to access the permissions configuration. You can add members from the "+ New Team Member" button.

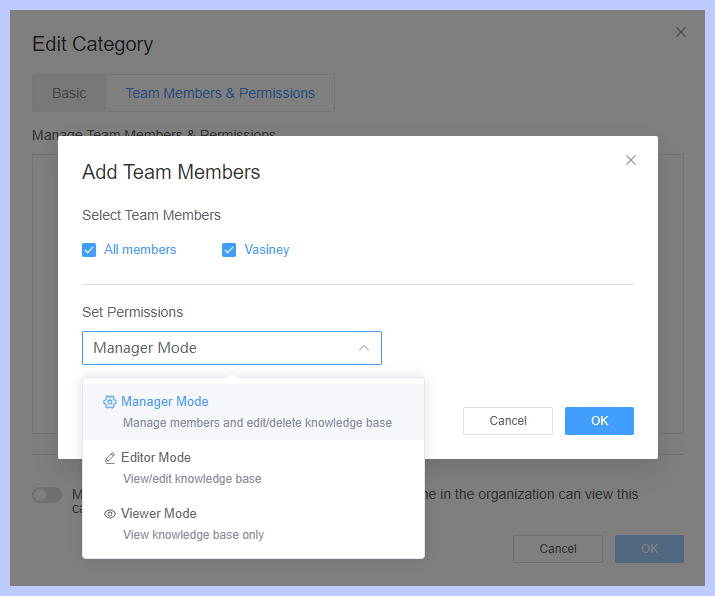
- Step 3Select Team Members to Set Permissions
- You can set different permissions for the member.
- ● Manager Mode: Manage members and edit/delete knowledge base.
- ● Editor Mode: view or edit knowledge base.
- ● Viewer Mode: view knowledge base only.

- After configuring the permissions for the role in the knowledge base, save the changes.
- Step 4Manage Team Member
- To assign the role to a specific member for the knowledge base, go to the member management section or the list of members. Here, you can change the permissions or delete the member.


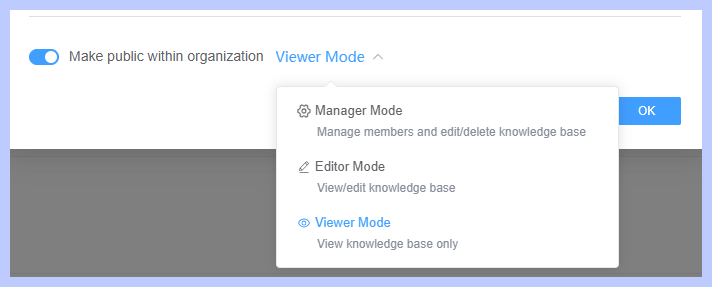
- Step 5Set Permissions for Everyone in the Organization
- You can also turn on the button to make everyone in the organization have permission to view this category. Also, you can set different permissions for everyone.

Repeat the above steps for members if you want to assign specific permissions to them. It's important to regularly review and update member permissions as needed to ensure the appropriate level of access and security within ChatInsight.AI.
Was This Page Helpful?
Still need help? Submit a request >>