● Custom Business Copilot AI Chatbot;
● Available 24/7 to Enhance Support Experience;
● Personalized Training with Customized Knowledge;
● Instant Answers to Your Enterprise-specific Questions;
● No Coding Required to Support Multiple Languages.
Learn MoreStart for FreeHow to Use Tags to Evaluate the Quality of Chatbot Responses?
ChatInsight.AI offers a feature named Tags, which is designed to aid you in classifying and scrutinizing the quality of your chatbot's responses.
This guide will walk you through using tags for effective management and quick recognition of chatbot responses.
1Understanding Tags in ChatInsight.AI
Tags in ChatInsight.AI are a powerful tool that can help you categorize and evaluate the quality of your chatbot's responses. By assigning specific tags to each response, you can easily analyze the effectiveness and relevance of your chatbot's communication.
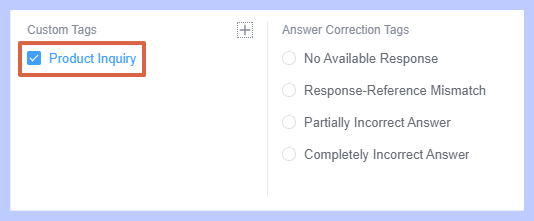
Two types of tags are available - "Answer Correction Tags" and "Custom Tags".
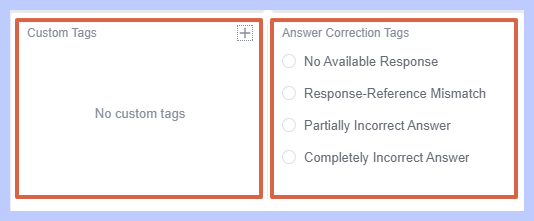
"Answer Correction Tags" include five options: No Available Response, Response-Reference Mismatch, Partially Incorrect Answer, and Completely Incorrect Answer. These are the system's default tags, and only one can be selected for each chatbot-generated response.
"Custom Tags" are user-created labels that can be designed according to specific business requirements. Up to 99 custom tags can be set, and multiple custom tags can be applied to a single answer.
2Create Custom Tags
To create a custom tag, follow these steps:
- Step 1
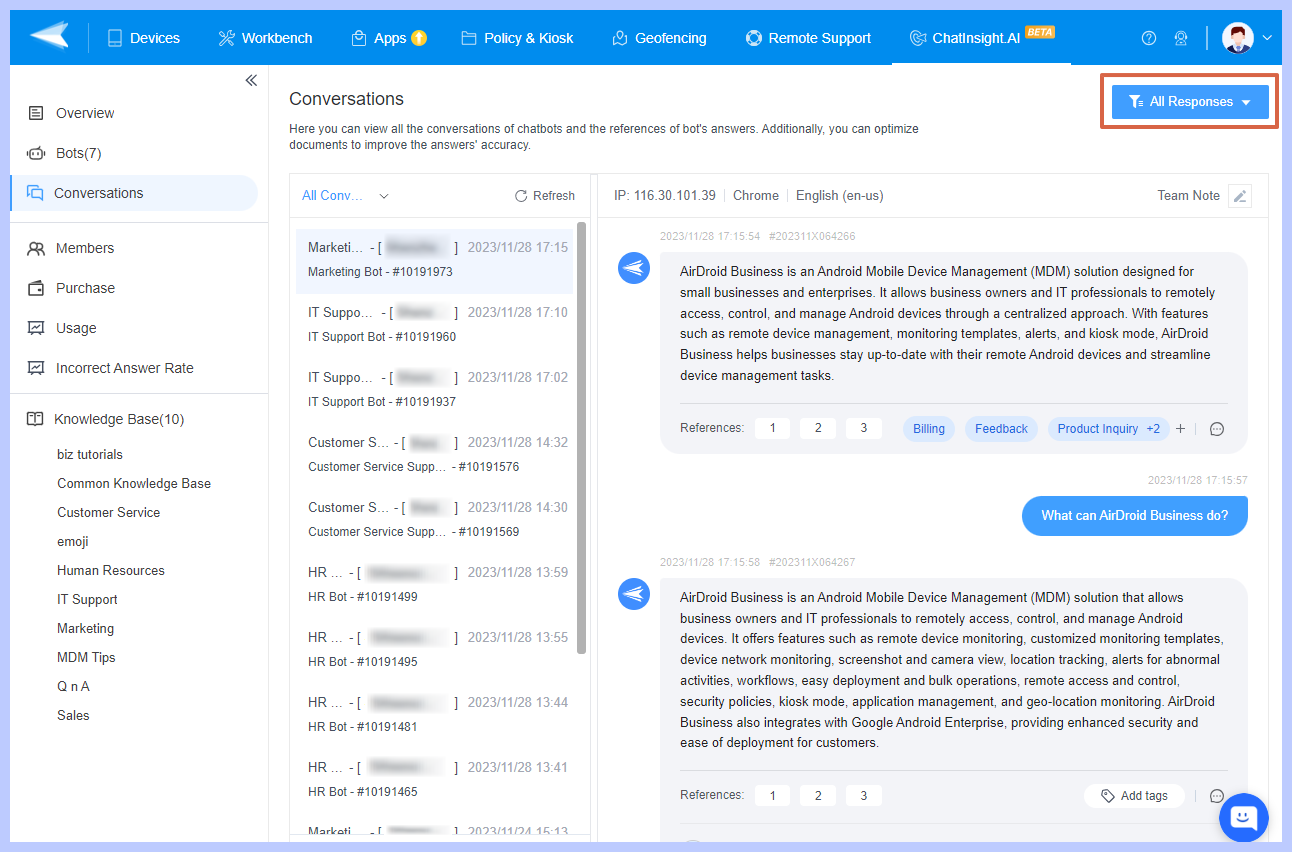
- Select the conversation you want to tag: Admin Console > ChatInsight.AI > Conversations > View Conversations.
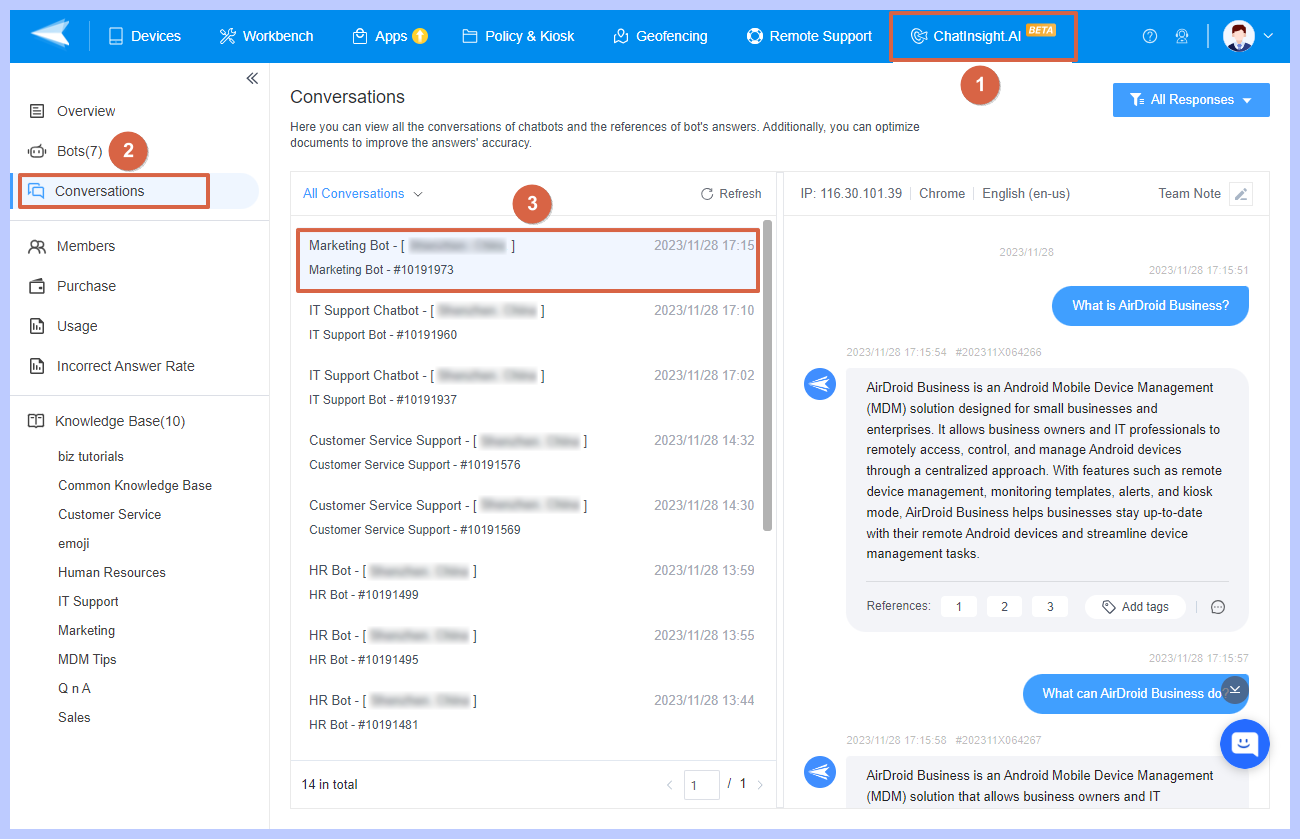

- Step 2
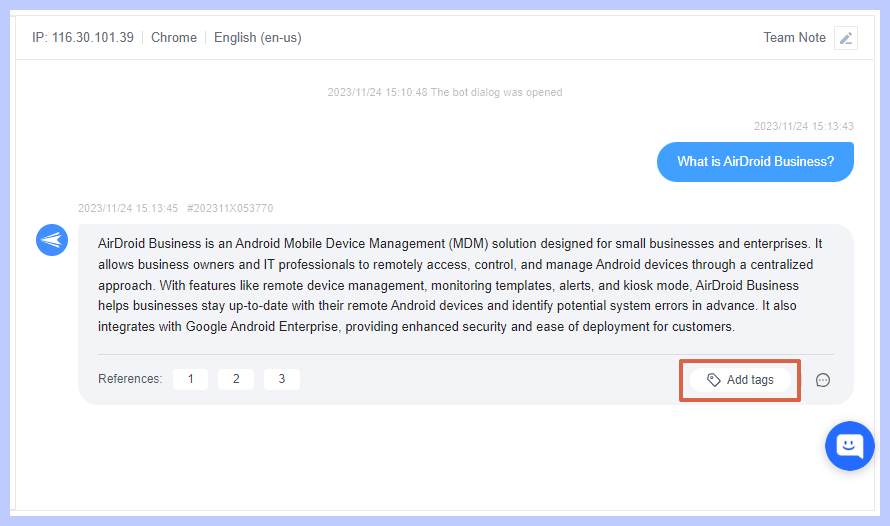
- Choose the chatbot response you wish to tag.
- Step 3
- Click on the Add Tags icon. A pop-up window will be appear which is divided into two sections.
- The left side is for "Custom Tags", and the right is for system default "Answer Correction Tags".


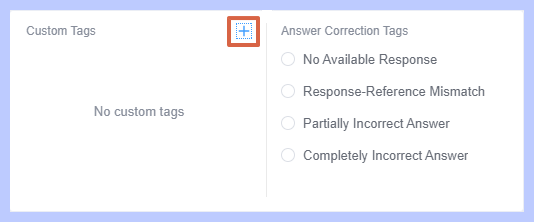
- Step 4
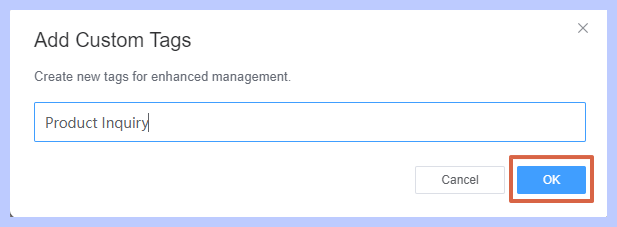
- Click on the + icon on the left and type the tag's name in the pop-up window.

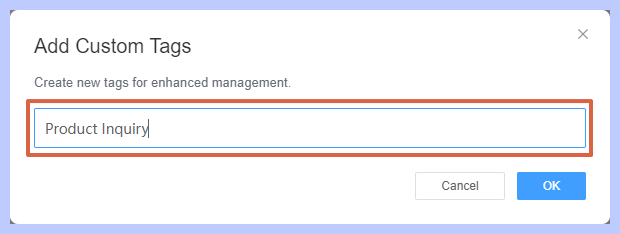

- Step 5
- Click the "OK" button to complete the creation.


3Appointing Tags to Chatbot Responses
After creating tags, assign them to specific chatbot responses by:
- Step 1
- Navigate to the Conversations module, select a conversation, and choose the responses you wish to tag.
- Step 2
- Click "Add Tag" next to the selected response.
- Step 3
- Select the appropriate tag from the drop-down menu.
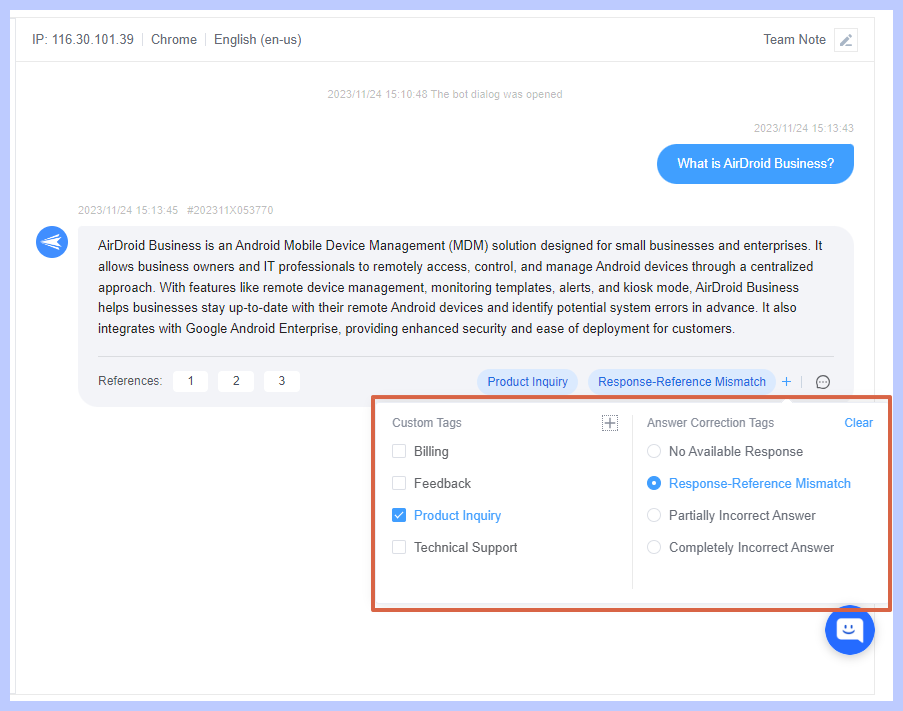

- "Answer Correction Tags" are the system's default tags, meaning only one error reason can be selected for each response.
- However, one response can be tagged with multiplecustom tags.
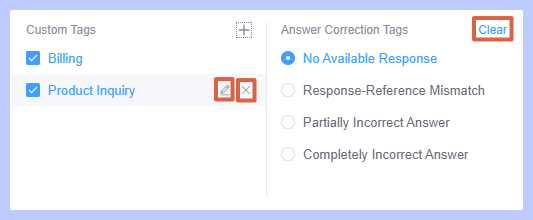
4Modifying Tags
You can edit or delete tags at any time:
To edit "Custom Tags", click the edit icon on the right of the custom tag you wish to change.
To delete "Custom Tags", click the delete icon on the right of the custom tag you want to remove and confirm in the pop-up window.
To clear and change the "Answer Correction Tags", click "Clear" and choose another "Answer Correction Tag".
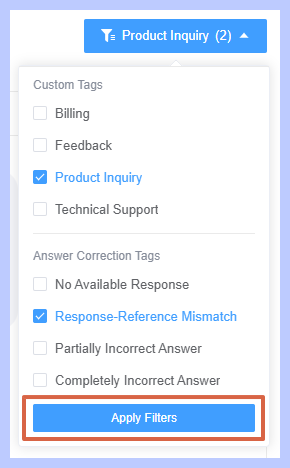
5Filter Responses Using Tags
Once responses are tagged, you can filter them by tag. This feature enables you to view detailed statistics on the number of responses received for each tag, offering insights into your chatbot's performance. For instance, a high number of "Answer Correction Tags" may indicate that your chatbot needs additional training in certain areas.
To filter responses:
- Step 1
- Go to Admin Console > ChatInsight.AI > Conversations > click the Filter Button on the top right corner.

- Step 2
- Tick the tags you wish to check.


- Step 3
- Click the "Apply Filters" button.
After filtering, on the left, the conversation will display the filtered chat history containing the corresponding tag. On the right, the content of each tagged question and answer will be displayed, divided into sections.
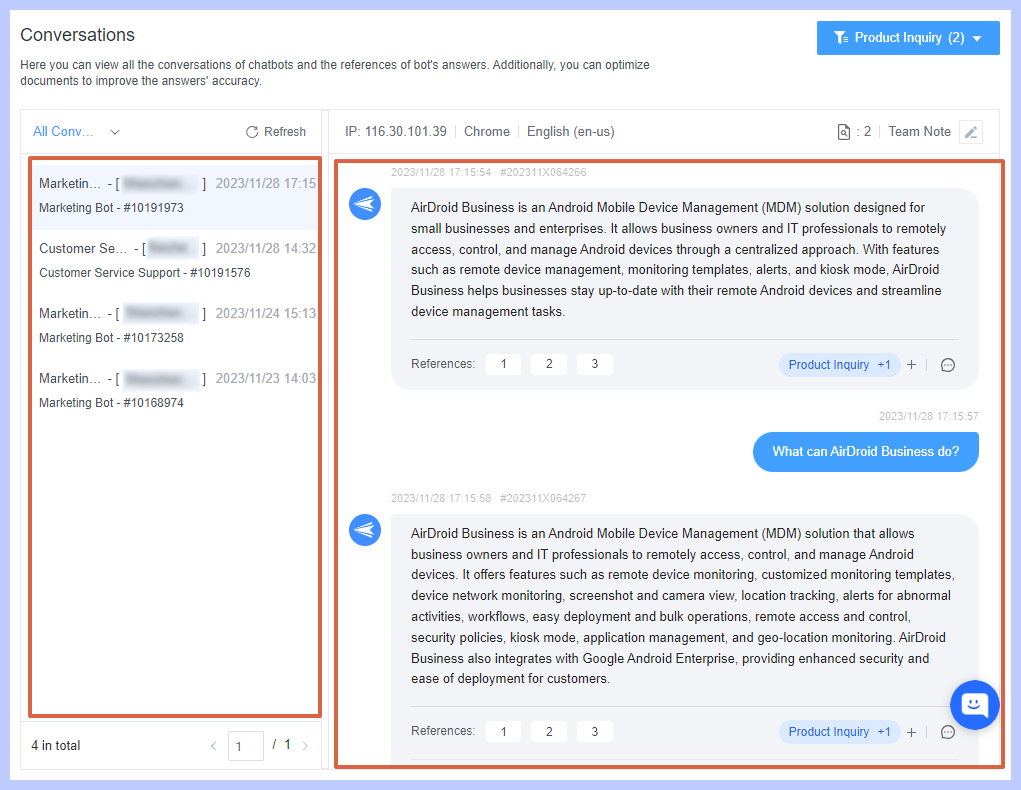
Users can click "View More" above and below each section to load more historical content.
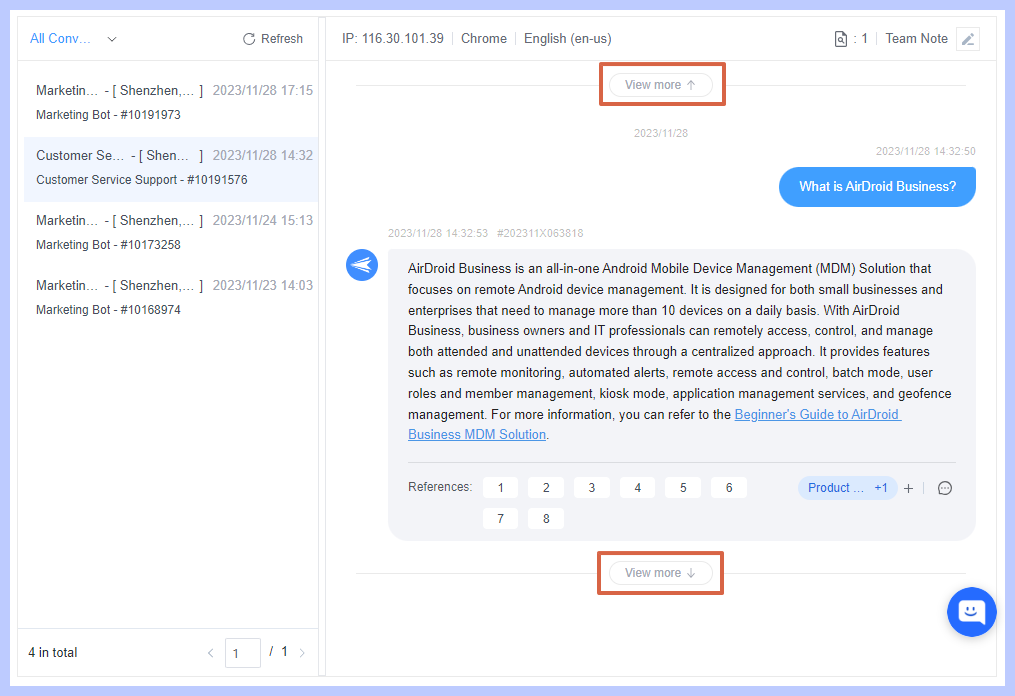
The top shows the number of related records in this chat history.

As only one option of "Answer Correction Tags" can be added to each answer when tagging, if multiple "Answer Correction Tags" options are selected during filtering, the filtered results must include results with one option of "Answer Correction Tags".
For example, if the "Custom Tags" is 'A' and "Answer Correction Tags" is 'B', and the filtered tags are 'A1', 'A2', 'B1', 'B2', the results will be: 'A1+B1', 'A1+B2', 'A2+B1', 'A2+B2', 'A1+ A2+B1', 'A1+A2+B2'.
Still need help? Submit a request >>